Upgrade LibreOffice 7.6.0.3 on Linux Mint

Commands to install LibreOffice 7.6.0.3 from the Terminal in Linux Mint. Get link to most recent version from https://download.documentfoundation.org/libreoffice/stable/

# tip: cache password with "sudo ls"
# uninstall currently installed version
sudo apt-get remove libreoffice*
sudo apt-get remove --purge libreoffice*

# download and install LibreOffice
cd ~/Install
wget https://download.documentfoundation.org/libreoffice/stable/7.6.0/deb/x86_64/LibreOffice_7.6.0_Linux_x86-64_deb.tar.gz
tar -xvzf LibreOffice_7.6.0_Linux_x86-64_deb.tar.gz
cd LibreOffice_7.6.0.3_Linux_x86-64_deb/DEBS
sudo dpkg -i *.deb

# download and install offline help files 
cd ~/Install
wget https://download.documentfoundation.org/libreoffice/stable/7.6.0/deb/x86_64/LibreOffice_7.6.0_Linux_x86-64_deb_helppack_en-US.tar.gz
tar -xvzf LibreOffice_7.6.0_Linux_x86-64_deb_helppack_en-US.tar.gz
cd LibreOffice_7.6.0.3_Linux_x86-64_deb_helppack_en-US/DEBS/
sudo dpkg -i *.deb

# delete extracted installation files
cd ~/Install
rm -rf ~/Install/LibreOffice_7.6.0.3_Linux_x86-64_deb
rm -rf ~/Install/LibreOffice_7.6.0.3_Linux_x86-64_deb_helppack_en-US

Note: this is a major release update you may want to skip. One change that is a bit jarring is the change of the Comment indicator. It went from a small red triangle to a larger purple triangle with a black outline. There is still no ability to style the comment indicator.
Screenshot of LibreOffice Calc showing the new Comment Indicator style.

Remmina toolbar transparency

While using Remmina (the remote access screen and file sharing tool that supports VNC and RDP) on Linux the toolbar at the top may become transparent making it very difficult to see.


This appears to only be an issue with Remmina installed using Flatpak and was reported several years ago [1][2].

Fortunately, in the latter report a solution is presented once you get past the condescending tone about not reporting bugs in support forums. Apparently this is a feature – not a bug. The fix is to use the scroll wheel on the mouse while positioning the cursor over the toolbar (on touchpads use 2-finger scroll).

Upgrade LibreOffice 7.4.4.2 on Linux Mint

Commands to install LibreOffice 7.4.4.2 from the Terminal in Linux Mint. Get link to most recent version from https://download.documentfoundation.org/libreoffice/stable/

# tip: cache password with "sudo ls"
# uninstall currently installed version
sudo apt-get remove libreoffice*
sudo apt-get remove --purge libreoffice*

# download and install LibreOffice
cd ~/Install
wget https://download.documentfoundation.org/libreoffice/stable/7.4.4/deb/x86_64/LibreOffice_7.4.4_Linux_x86-64_deb.tar.gz
tar -xvzf LibreOffice_7.4.4_Linux_x86-64_deb.tar.gz
cd LibreOffice_7.4.4.2_Linux_x86-64_deb/DEBS
sudo dpkg -i *.deb

# download and install offline help files 
cd ~/Install
wget https://download.documentfoundation.org/libreoffice/stable/7.4.4/deb/x86_64/LibreOffice_7.4.4_Linux_x86-64_deb_helppack_en-US.tar.gz
tar -xvzf LibreOffice_7.4.4_Linux_x86-64_deb_helppack_en-US.tar.gz
cd LibreOffice_7.4.4.2_Linux_x86-64_deb_helppack_en-US/DEBS
sudo dpkg -i *.deb

# delete extracted installation files
cd ~/Install
rm -rf ~/Install/LibreOffice_7.4.4.2_Linux_x86-64_deb
rm -rf ~/Install/LibreOffice_7.4.4.2_Linux_x86-64_deb_helppack_en-US

Do Something on Plug-in of USB Drive

Linux is able to identify a device when something is plugged into an already-running system and then do something in response. Part of this is done with Udev which supplies a dynamic device directory containing only the nodes for devices which are connected to the system. It creates or removes the device node files in the /dev directory as they are plugged in or taken out.

Using this I am able to backup a Linux system to an external hard drive just by plugging in the USB drive. When the drive is connected Linux will detect it, mount it, and start a backup. Once the backup is done the drive will remain mounted so I can review the files before removing the drive.

The process goes something like this: I plug in the USB drive, the system will detect it and mount the drive. A Udev rule will fire off a small script creating a job using “AT” to start the backup script one minute later. AT will start the backup script which will create a directory on the USB drive and backup files to that directory. I then review the backup, unmount the drive, then unplug it.

Udev rules are stored in these two locations:

joey@HAVEN-E6520:~$ ls /usr/lib/udev/rules.d
total 940K
-rw-r--r-- 1 root root  947 Nov 30  2019 39-usbmuxd.rules
-rw-r--r-- 1 root root  998 Jan 20  2019 40-usb-media-players.rules
-rw-r--r-- 1 root root  42K Feb 24  2020 40-usb_modeswitch.rules
-rw-r--r-- 1 root root  655 Aug 31 11:27 40-vm-hotadd.rules
-rw-r--r-- 1 root root  210 Feb 16  2022 50-firmware.rules
-rw-r--r-- 1 root root 3.9K Aug 31 11:27 50-udev-default.rules
-rw-r--r-- 1 root root 7.2K Feb 13  2020 55-dm.rules
-rw-r--r-- 1 root root 1.5K Apr  6  2020 56-dm-parts.rules
-rw-r--r-- 1 root root  921 Sep 13  2021 56-hpmud.rules
-rw-r--r-- 1 root root 2.4K Feb 13  2020 56-lvm.rules
-rw-r--r-- 1 root root 8.4K Aug 31 11:27 60-autosuspend-chromiumos.rules
-rw-r--r-- 1 root root  703 Apr  1  2020 60-block.rules
-rw-r--r-- 1 root root 1.1K Apr  1  2020 60-cdrom_id.rules
-rw-r--r-- 1 root root   69 Jan 17  2017 60-crda.rules
-rw-r--r-- 1 root root  413 Apr  1  2020 60-drm.rules
-rw-r--r-- 1 root root  990 Apr  1  2020 60-evdev.rules
-rw-r--r-- 1 root root  394 Apr  1  2020 60-fido-id.rules
-rw-r--r-- 1 root root  329 Jan  8  2016 60-inputattach.rules
-rw-r--r-- 1 root root  282 Apr  1  2020 60-input-id.rules
-rw-r--r-- 1 root root 7.2K Jun 15  2020 60-libgphoto2-6.rules
-rw-r--r-- 1 root root 3.5K Sep 17  2020 60-libsane.rules
-rw-r--r-- 1 root root  201 Jul 25  2016 60-openobex.rules
-rw-r--r-- 1 root root  912 Feb 10  2020 60-pcmcia.rules
-rw-r--r-- 1 root root  616 Apr  1  2020 60-persistent-alsa.rules
-rw-r--r-- 1 root root 2.7K Apr  1  2020 60-persistent-input.rules
-rw-r--r-- 1 root root 1.8K Feb 13  2020 60-persistent-storage-dm.rules
-rw-r--r-- 1 root root 7.6K Aug 31 11:27 60-persistent-storage.rules
-rw-r--r-- 1 root root 2.1K Apr  1  2020 60-persistent-storage-tape.rules
-rw-r--r-- 1 root root  769 Apr  1  2020 60-persistent-v4l.rules
-rw-r--r-- 1 root root  736 Apr  1  2020 60-sensor.rules
-rw-r--r-- 1 root root 1.2K Apr  1  2020 60-serial.rules
-rw-r--r-- 1 root root  211 Dec  3  2019 60-tpm-udev.rules
-rw-r--r-- 1 root root  181 Mar  6  2022 60-virtualbox-dkms.rules
-rw-r--r-- 1 root root  454 May 11  2021 60-virtualbox.rules
-rw-r--r-- 1 root root  565 Apr  1  2020 61-autosuspend-manual.rules
-rw-r--r-- 1 root root  292 Apr 29  2020 61-gnome-settings-daemon-rfkill.rules
-rw-r--r-- 1 root root  292 Aug 21  2021 61-mate-settings-daemon-rfkill.rules
-rw-r--r-- 1 root root  456 Aug 31 11:27 61-persistent-storage-android.rules
-rw-r--r-- 1 root root  387 Feb 15  2020 64-btrfs-dm.rules
-rw-r--r-- 1 root root  612 Aug 31 11:27 64-btrfs.rules
-rw-r--r-- 1 root root  257 Jul  6 09:53 64-xorg-xkb.rules
-rw-r--r-- 1 root root  75K Apr 21  2021 65-libwacom.rules
-rw-r--r-- 1 root root  190 Jun  5  2020 66-snapd-autoimport.rules
-rw-r--r-- 1 root root 1.2K Apr  6  2020 68-del-part-nodes.rules
-rw-r--r-- 1 root root 4.9K Mar 20  2020 69-cd-sensors.rules
-rw-r--r-- 1 root root 225K Mar 26  2020 69-libmtp.rules
-rw-r--r-- 1 root root 6.5K Feb 13  2020 69-lvm-metad.rules
-rw-r--r-- 1 root root 1.2K Mar 11  2020 69-wacom.rules
-rw-r--r-- 1 root root  432 Apr  1  2020 70-joystick.rules
-rw-r--r-- 1 root root  734 Apr  1  2020 70-mouse.rules
-rw-r--r-- 1 root root  172 Feb 21  2019 70-pcspkr-beep.rules
-rw-r--r-- 1 root root  568 Apr  1  2020 70-power-switch.rules
-rw-r--r-- 1 root root  429 Nov  3  2020 70-printers.rules
-rw-r--r-- 1 root root  473 Apr  1  2020 70-touchpad.rules
-rw-r--r-- 1 root root 3.9K Jul 13  2019 70-u2f.rules
-rw-r--r-- 1 root root 2.8K Aug 31 11:27 70-uaccess.rules
-rw-r--r-- 1 root root  461 Aug 31 11:27 71-power-switch-proliant.rules
-rw-r--r-- 1 root root 3.7K Aug 31 11:27 71-seat.rules
-rw-r--r-- 1 root root  437 Mar 16  2022 71-u-d-c-gpu-detection.rules
-rw-r--r-- 1 root root  636 Aug 31 11:27 73-seat-late.rules
-rw-r--r-- 1 root root  969 Aug 30 04:40 73-special-net-names.rules
-rw-r--r-- 1 root root  452 Apr  1  2020 75-net-description.rules
-rw-r--r-- 1 root root  174 Apr  1  2020 75-probe_mtd.rules
-rw-r--r-- 1 root root  936 Apr  8  2022 77-mm-broadmobi-port-types.rules
-rw-r--r-- 1 root root 3.7K Apr  8  2022 77-mm-cinterion-port-types.rules
-rw-r--r-- 1 root root 1.8K Apr  8  2022 77-mm-dell-port-types.rules
-rw-r--r-- 1 root root  866 Apr  8  2022 77-mm-dlink-port-types.rules
-rw-r--r-- 1 root root 7.9K Apr  8  2022 77-mm-ericsson-mbm.rules
-rw-r--r-- 1 root root 3.1K Apr  8  2022 77-mm-fibocom-port-types.rules
-rw-r--r-- 1 root root 1.6K Apr  8  2022 77-mm-foxconn-port-types.rules
-rw-r--r-- 1 root root  907 Apr  8  2022 77-mm-gosuncn-port-types.rules
-rw-r--r-- 1 root root  525 Apr  8  2022 77-mm-haier-port-types.rules
-rw-r--r-- 1 root root 2.5K Apr  8  2022 77-mm-huawei-net-port-types.rules
-rw-r--r-- 1 root root  15K Apr  8  2022 77-mm-longcheer-port-types.rules
-rw-r--r-- 1 root root 3.3K Apr  8  2022 77-mm-mtk-port-types.rules
-rw-r--r-- 1 root root 2.2K Apr  8  2022 77-mm-nokia-port-types.rules
-rw-r--r-- 1 root root 1.6K Apr  8  2022 77-mm-qcom-soc.rules
-rw-r--r-- 1 root root 3.1K Oct 12  2021 77-mm-qdl-device-blacklist.rules
-rw-r--r-- 1 root root 4.4K Apr  8  2022 77-mm-quectel-port-types.rules
-rw-r--r-- 1 root root 1.6K Apr  8  2022 77-mm-sierra.rules
-rw-r--r-- 1 root root 3.8K Apr  8  2022 77-mm-simtech-port-types.rules
-rw-r--r-- 1 root root 9.2K Apr  8  2022 77-mm-telit-port-types.rules
-rw-r--r-- 1 root root  739 Apr  8  2022 77-mm-tplink-port-types.rules
-rw-r--r-- 1 root root 4.2K Apr  8  2022 77-mm-ublox-port-types.rules
-rw-r--r-- 1 root root 4.5K Apr  8  2022 77-mm-x22x-port-types.rules
-rw-r--r-- 1 root root  17K Apr  8  2022 77-mm-zte-port-types.rules
-rw-r--r-- 1 root root  965 Aug 31 11:27 78-graphics-card.rules
-rw-r--r-- 1 root root 4.8K Apr  1  2020 78-sound-card.rules
-rw-r--r-- 1 root root 1.4K Aug 31 11:27 80-debian-compat.rules
-rw-r--r-- 1 root root  615 Apr  1  2020 80-drivers.rules
-rw-r--r-- 1 root root  190 Jan 28  2019 80-ifupdown.rules
-rw-r--r-- 1 root root 1.3K Mar 31  2022 80-iio-sensor-proxy.rules
-rw-r--r-- 1 root root  211 Apr 14  2022 80-libinput-device-groups.rules
-rw-r--r-- 1 root root 2.1K Apr  8  2022 80-mm-candidate.rules
-rw-r--r-- 1 root root  295 Aug 31 11:27 80-net-setup-link.rules
-rw-r--r-- 1 root root  11K Sep  5  2021 80-udisks2.rules
-rw-r--r-- 1 root root  528 Aug 31 11:27 81-net-dhcp.rules
-rw-r--r-- 1 root root  528 Nov 26  2021 84-nm-drivers.rules
-rw-r--r-- 1 root root  11K Mar  3  2020 85-brltty.rules
-rw-r--r-- 1 root root   82 Aug 21  2019 85-hdparm.rules
-rw-r--r-- 1 root root 1.9K Jan 30  2020 85-hplj10xx.rules
-rw-r--r-- 1 root root 1.7K Nov 26  2021 85-nm-unmanaged.rules
-rw-r--r-- 1 root root  221 Feb  5  2018 85-regulatory.rules
-rw-r--r-- 1 root root  563 Apr 14  2021 90-alsa-restore.rules
-rw-r--r-- 1 root root  350 Dec  1  2020 90-bolt.rules
-rw-r--r-- 1 root root  265 Apr 23  2019 90-console-setup.rules
-rw-r--r-- 1 root root  281 Jul  2 23:18 90-fwupd-devices.rules
-rw-r--r-- 1 root root 1.9K Sep 25  2019 90-libgpod.rules
-rw-r--r-- 1 root root 1.1K Apr 14  2022 90-libinput-fuzz-override.rules
-rw-r--r-- 1 root root  576 Nov 26  2021 90-nm-thunderbolt.rules
-rw-r--r-- 1 root root 9.2K Nov 19  2021 90-pulseaudio.rules
-rw-r--r-- 1 root root  847 Mar  8  2019 95-cd-devices.rules
-rw-r--r-- 1 root root  479 Feb 13  2020 95-dm-notify.rules
-rw-r--r-- 1 root root 1.4K Apr  6  2020 95-kpartx.rules
-rw-r--r-- 1 root root 1.6K Dec 10  2019 95-upower-csr.rules
-rw-r--r-- 1 root root  570 Dec 10  2019 95-upower-hidpp.rules
-rw-r--r-- 1 root root 8.0K Dec 10  2019 95-upower-hid.rules
-rw-r--r-- 1 root root  354 Dec 10  2019 95-upower-wup.rules
-rw-r--r-- 1 root root  171 Jun  1 20:59 96-e2scrub.rules
-rw-r--r-- 1 root root  372 Jan  5  2020 97-dmraid.rules
-rw-r--r-- 1 root root 1.5K Jun  8 07:09 97-hid2hci.rules
-rw-r--r-- 1 root root 4.7K Aug 31 11:27 99-systemd.rules

joey@HAVEN-E6520:~$ ls /etc/udev/rules.d
total 112K
-rwxr-xr-x 1 root root 1.9K May 12  2020 40-libsane.rules
-rw-r--r-- 1 root root  921 May 12  2020 56-hpmud.rules
-rw-r--r-- 1 root root  62K Jun  7 22:42 70-snap.core.rules
-rw-r--r-- 1 root root 1011 Jun  7 22:42 70-snap.freecell-solitaire.rules
-rw-r--r-- 1 root root 2.6K Jun  7 22:42 70-snap.keepassxc.rules
-rw-r--r-- 1 root root  941 Jun  7 22:42 70-snap.motioneye.rules
-rw-r--r-- 1 root root 1.4K Jun  7 22:42 70-snap.mysql-workbench-community.rules
-rw-r--r-- 1 root root 1.2K Jun  7 22:42 70-snap.notepadqq.rules
-rw-r--r-- 1 root root  935 Jun  7 22:42 70-snap.skype.rules
-rw-r--r-- 1 root root  935 Jun  7 22:42 70-snap.slack.rules
-rw-r--r-- 1 root root  885 Jun  7 22:42 70-snap.spotify.rules
-rw-r--r-- 1 root root  989 Jun  7 22:42 70-snap.vlc.rules
-rwxr-xr-x 1 root root 1.9K May 12  2020 S99-2000S1.rules

I created my Udev rule in the “/etc/udev/rules.d” directory. The next step was to identify the USB drive when connected. The command “udevadm” is used to determine this. The important parts of the command’s output are highlighted below.

  joey@HAVEN-E6520:~$ udevadm monitor --kernel --property --subsystem-match=usb
  monitor will print the received events for:
  KERNEL - the kernel uevent

  KERNEL[687713.585492] add      /devices/pci0000:00/0000:00:1d.0/usb2/2-1/2-1.4 (usb)
  ACTION=add 
  DEVPATH=/devices/pci0000:00/0000:00:1d.0/usb2/2-1/2-1.4
  SUBSYSTEM=usb 
  DEVNAME=/dev/bus/usb/002/013
  DEVTYPE=usb_device              NOTE: THIS IS THE DEVICE  
  PRODUCT=152d/562/3 
  TYPE=0/0/0
  BUSNUM=002
  DEVNUM=013
  SEQNUM=75152
  MAJOR=189
  MINOR=140

  KERNEL[687713.586155] add      /devices/pci0000:00/0000:00:1d.0/usb2/2-1/2-1.4/2-1.4:1.0 (usb)
  ACTION=add 
  DEVPATH=/devices/pci0000:00/0000:00:1d.0/usb2/2-1/2-1.4/2-1.4:1.0
  SUBSYSTEM=usb 
  DEVTYPE=usb_interface           NOTE: THIS IS THE INTERFACE  
  PRODUCT=152d/562/3 
  TYPE=0/0/0
  INTERFACE=8/6/80
  MODALIAS=usb:v152Dp0562d0003dc00dsc00dp00ic08isc06ip50in00
  SEQNUM=75153

  KERNEL[687713.587040] bind     /devices/pci0000:00/0000:00:1d.0/usb2/2-1/2-1.4/2-1.4:1.0 (usb)
  ACTION=bind
  DEVPATH=/devices/pci0000:00/0000:00:1d.0/usb2/2-1/2-1.4/2-1.4:1.0
  SUBSYSTEM=usb
  DEVTYPE=usb_interface
  DRIVER=uas
  PRODUCT=152d/562/3
  TYPE=0/0/0
  INTERFACE=8/6/98
  MODALIAS=usb:v152Dp0562d0003dc00dsc00dp00ic08isc06ip62in00
  SEQNUM=75156

  KERNEL[687713.587110] bind     /devices/pci0000:00/0000:00:1d.0/usb2/2-1/2-1.4 (usb)
  ACTION=bind
  DEVPATH=/devices/pci0000:00/0000:00:1d.0/usb2/2-1/2-1.4
  SUBSYSTEM=usb
  DEVNAME=/dev/bus/usb/002/013
  DEVTYPE=usb_device
  DRIVER=usb
  PRODUCT=152d/562/3
  TYPE=0/0/0
  BUSNUM=002
  DEVNUM=013
  SEQNUM=75157
  MAJOR=189
  MINOR=140

The next step was to create a Udev rule. Udev rules are processed in order. Therefore, I named mine starting with “99” to make sure it is one of the last rules to run. I also named the rule something descriptive and specific to the device attached.

sudo nano /etc/udev/rules.d/99-usbdrive-fantom6.rules  

This rule only needs a single line to execute a script.

ACTION=="add", SUBSYSTEM=="usb", ENV{DEVTYPE}=="usb_device", ENV{PRODUCT}=="152d/562/3", RUN+="/home/joey/Scripts/udev.sh 1> /dev/null"  

Conditions for UDEV rule:

  • ACTION==”add” match if device added (not removed)
  • SUBSYSTEM==”usb” match if subsystem is “usb”
  • ENV{DEVTYPE}==”usb_device” match if devtype is “usb_device” (not :usb_interface”) – without this the script ran twice
  • ENV{PRODUCT}==”152d/562/3″ match if product is “152d/562/3”

What to do if conditions match:

  • RUN+=”/home/joey/Scripts/udev.sh” – command needs to be quick else drive will not mount

It appears the action performed by the rule needs to be quick. I initially tried running the backup script from the rule but, the drive would not mount. I determined it would only mount after the rule completed.

The rule runs the following script that essentially does just one thing: schedule the execution of another script that does the backup. However, some extra commands are run to log results and display a notification on the screen.

#!/bin/bash
LOGFILE='/home/joey/script.log'

echo "$(date)|INFO|Starting script: udev.sh" >> "$LOGFILE"

# https://stackoverflow.com/questions/28195805/running-notify-send-as-root
function notify-send() {
  #Detect the name of the display in use
  local display=":$(ls /tmp/.X11-unix/* | sed 's#/tmp/.X11-unix/X##' | head -n 1)"

  #Detect the user using such display
  local user=$(who | grep '('$display')' | awk '{print $1}' | head -n 1)

  #Detect the id of the user
  local uid=$(id -u $user)

  sudo -u $user DISPLAY=$display DBUS_SESSION_BUS_ADDRESS=unix:path=/run/user/$uid/bus notify-send "$@"
}

# send notification
notify-send "External Harddrive Detected" "Fantom external drive has been detected. A backup will be started soon." -t 0 -u Normal -i /usr/share/icons/gnome/48x48/devices/drive-multidisk.png

# schedule a backup
echo "sudo -u joey /home/joey/Scripts/backup_e6520.sh" | at now + 1 minute


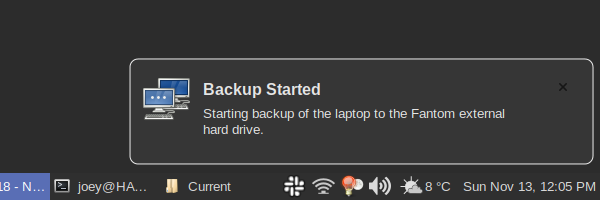
With this script and the Udev rule in-place the execution of a backup script is scheduled and the following notification pops-up when the USB drive is connected.

About one minute after plugging in the external drive the following backup script is executed and another pop-up notification is displayed.

#!/bin/bash
# Backup Dell E6520 laptop to Fantom "F6" external harddrive

# Run from via cron (NOT USED):
# /home/joey/Scripts/backup_e6520.sh
# ---------- copy ----------
# Backup Dropbox at 1AM each day
# * 1 * * * /home/joey/Scripts/backup_e6520.sh 1> /dev/null
# ---------- copy ----------

# save and change IFS
OLDIFS=$IFS
IFS=$'\n'

RUNDATE=`date +%Y%m%d`                     # append date to file
LOGFILE='/home/joey/script.log'
LOCKFILE="/home/joey/Temp/backup_e6520.lock"
#SCRIPT=`basename "$0"`                     # get name of this script
SCRIPT='/home/joey/Scripts/backup_e6520.sh'
TARGETDIR="/media/joey/F6/Backups/Laptop E6520/$RUNDATE"

TITLE_BACKUP_START='Backup Started'
MESSAGE_BACKUP_START='Starting backup of the laptop to the Fantom external hard drive.'
TITLE_BACKUP_DONE='Backup Completed'
MESSAGE_BACKUP_DONE='Backup of the laptop to the Fantom external hard drive has completed.'
TITLE_BACKUP_WARN='Backup Failed'
MESSAGE_BACKUP_WARN='Backup of the laptop to the Fantom external hard drive has failed. Check the script log.'

# function to allow notifications to logged-in user
function notify-send() {
    #Detect the name of the display in use
    local display=":$(ls /tmp/.X11-unix/* | sed 's#/tmp/.X11-unix/X##' | head -n 1)"

    #Detect the user using such display
    local user=$(who | grep '('$display')' | awk '{print $1}' | head -n 1)

    #Detect the id of the user
    local uid=$(id -u $user)

    sudo -u $user DISPLAY=$display DBUS_SESSION_BUS_ADDRESS=unix:path=/run/user/$uid/bus notify-send "$@"
}

echo --------------------------------------------------------------------------  | tee -a "$LOGFILE"
echo "$(date)|INFO|Starting script: $SCRIPT" >> "$LOGFILE"
echo "Starting script: `date`"

# send notification
notify-send "$TITLE_BACKUP_START" "$MESSAGE_BACKUP_START" -t 0 -u Normal -i /usr/share/icons/gnome/48x48/status/network-transmit.png

# if lock file exists something is wrong - abort
if [ -f "$LOCKFILE" ]; then

  # lock file exists
  echo "$(date)|ERROR|Lock file exists. Aborting." >> "$LOGFILE"
  echo "Error: lock file exists."
  echo "Note: this script is run automatically when the USB hard drive is plugged in and may be running."

  # send notification
  notify-send "$TITLE_BACKUP_WARN" "$MESSAGE_BACKUP_WARN" -t 0 -u Normal -i /usr/share/icons/gnome/48x48/status/dialog-warning.png

else    

  echo "$(date)|INFO|Lock file not found. Continuing." >> "$LOGFILE"

  # wait for USB drive to be mounted
  #sleep 30
  
  # check if backup folder already exists (if so abort)
  if [ -d "$TARGETDIR" ]; then

    # backup folder exists, abort
    echo "$(date)|ERROR|Backup folder exists. Aborting." >> "$LOGFILE"
    echo "Error: backup folder already exists. A backup has already been run."

    # send notification
    notify-send "$TITLE_BACKUP_WARN" "$MESSAGE_BACKUP_WARN" -t 0 -u Normal -i /usr/share/icons/gnome/48x48/status/dialog-warning.png

  else 

    #echo "Backup started: `date`" | tee -a "$LOGFILE"
    echo "$(date)|INFO|Backup started: `date`" >> "$LOGFILE"
    echo "Starting backup."

    # create lock file
    echo 'This file should not exist for more than a few hours.' > "$LOCKFILE"

    # Create an array to hold directories to backup
    declare -a DIRARRAY
    DIRARRAY+=('/home/joey/Desktop')
    DIRARRAY+=('/home/joey/Documents')
    DIRARRAY+=('/home/joey/Development')
    DIRARRAY+=('/home/joey/Pictures')
    DIRARRAY+=('/home/joey/Scripts')
    DIRARRAY+=('/home/joey/mame')
    DIRARRAY+=('/home/joey/Streams')
    DIRARRAY+=('/home/joey/websites')
    DIRARRAY+=('/home/joey/Temp')
    DIRARRAY+=('/home/joey/Videos')
    DIRARRAY+=('/home/joey/Downloads')
    DIRARRAY+=("/media/joey/SD Card/Dropbox/Dropbox")

    # Test: dump array
    #echo ${DIRARRAY[@]}

    # Create new backup destination folder
    mkdir "$TARGETDIR"

    #echo Backing-up folders to: "$TARGETDIR" | tee -a "$LOGFILE"
    echo "$(date)|INFO|Backing-up files to: $TARGETDIR" >> "$LOGFILE"
    echo "Backing-up files to: $TARGETDIR"

    # Backup each folder to a separate archive
    for i in ${DIRARRAY[@]}
    do
      #echo Processing folder: $i | tee -a "$LOGFILE"
      echo "$(date)|INFO|Processing folder: $i" >> "$LOGFILE"
      echo "Processing folder: $i"      
      
      SOURCEDIR=$i              # full path of folder to archive
      THISDIR=${i##*/}          # last name of folder in path
      FILENAME=$THISDIR.tar.gz  # name of backup file

      # strip leading slash off source directory path
      SOURCEDIR=${SOURCEDIR#/}

      # run archive command
      tar -C / -cpzf $TARGETDIR/$FILENAME $SOURCEDIR

    done

    # Delete array
    unset DIRARRAY

    # delete lockfile
    echo "$(date)|INFO|Deleting lock file" >> "$LOGFILE"
    rm $LOCKFILE

    # send notification
    notify-send "$TITLE_BACKUP_DONE" "$MESSAGE_BACKUP_DONE" -t 0 -u Normal -i /usr/share/icons/gnome/48x48/status/network-transmit.png

  fi  # check if backup folder exists
  
  # END PROCESSING
  
fi  # check if lock file exists

echo "$(date)|INFO|Processing complete. Restoring file system separator" >> "$LOGFILE"

# restore IFS
IFS=$OLDIFS

echo "$(date)|INFO|Exiting script" >> "$LOGFILE"
echo "Exiting script: `date`"
echo --------------------------------------------------------------------------  | tee -a "$LOGFILE"

exit


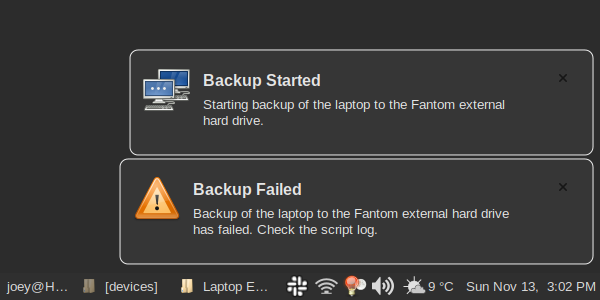
When the backup script is executed at the scheduled time the following notification is displayed and files start writing to the external hard drive.

When the backup is complete a final notification is displayed letting me know I can disconnect the hard drive. In this example, the backup script does not un-mount the USB drive. I leave it mounted so I can review the files backed-up.

If, when the backup script is executed, it detects an error (like a lock file indicating a backup is already taking place) it will not backup any files and display a notification of the error.

Troubleshooting

  • USB drive not mounting when plugged in.

    Check for an error in the Udev rule or the script that the rule fires off that is preventing the rule from finishing. It appears that no other rules that would’ve executed for this device will not run until yours completes – even if it is the last one.

  • Notifications sent in backup script not displayed.

    This is because udev.sh is run as root and submits the backup job also as root. So, when the backup script is running it is not running as you (or another user). This is discussed in this thread o Stack Overflow: https://stackoverflow.com/questions/28195805/running-notify-send-as-root

  • Monitor syslog for events.

    In another terminal window run the following to monitor the events taking place and scripts being executed: sudo tail -f /var/log/syslog

I had to install the “AT” command utility and could not find a way to script a job with “cron”. It may be possible to schedule the backup script using Systemd timers or some other mechanism. TBH Systemd is still new to me and I tend to fallback on old tried-and-true ways even if they are more expensive in time or resources.

Resources

https://www.thegeekdiary.com/how-to-run-a-script-when-usb-devices-is-attached-or-removed-using-udev/

http://migueleonardortiz.com.ar/udev/running-bash-scripts-using-udev-rules/1505

https://linuxconfig.org/tutorial-on-how-to-write-basic-udev-rules-in-linux

Mount Veracrypt volumes Linux script

In Veracrypt you can save mounted volumes as favorites which makes it easier to mount those volumes when starting Veracrypt. Although the container and mount path are saved you still need to enter the volume’s password and key if needed for each volume being mounted. On top of that, when using Linux you’ll be prompted to enter your Linux account password for sudo. With several volumes to mount this can be time-consuming and cumbersome.

Fortunately, Veracrypt includes the ability to manage encrypted volumes from the command-line. You can supply the password and key to mount the volumes on the commannd-line in the terminal. You can put these commands in a script to mount multiple volumes. Running from script will allow you to mount several volumes and only have to enter your Linux password for sudo once. However, putting passwords in scripts is a big security risk.

A better way is to have the script prompt for the password. The following script will mount multiple volumes and only prompt for the password one time. To make this work I set the password for the Veracrypt volumes the same as my Linux system password. The script will pass the sudo password (which is the same as the Veracrypt password) to the Veracrypt command satisfying the sudo prompt.

#!/bin/bash
# Mount/unmount Veracrypt (Truecrypt) volumes on Dell laptop
# v2 - Check for mounted volumes and unmount if found. Otherwise mount volumes.

# save and change IFS
OLDIFS=$IFS
IFS=$'\n'

RUNDATE=`date +%Y%m%d`                     # append date to file
LOGFILE='/home/joey/script.log'
LOCKFILE='/home/joey/Temp/veracrypt.lock'  # file to indicate volumes should be mounted
SCRIPT=`basename "$0"`                     # get name of this script

echo --------------------------------------------------------------------------  | tee -a "$LOGFILE"
echo "Executing script: $SCRIPT" | tee -a "$LOGFILE"

# prompt for password
echo "Enter Password (not echoed): "
read -s PASSWORD 

echo "NOTE: If prompted to enter 'Administrator' password, ignore it."

# Check for lock file. If exists unmount volumes else mount volumes
if [ -f $LOCKFILE ]; then 

  echo "Lock file found." | tee -a "$LOGFILE"
  echo "Attempting to un-mount Veracrypt volumes" | tee -a "$LOGFILE"

  # Unmount Veracrypt volumes
  veracrypt --text --dismount

  # Display system notification
  notify-send "Veracrypt" "Veracrypt volumes unmounted." -t 0 -u Normal -i /usr/share/icons/mate/48x48/status/changes-prevent.png

  # Remove lock file
  rm $LOCKFILE

else

  echo "Attempting to mount Veracrypt volumes" | tee -a "$LOGFILE"

  # PUT KEYLESS VOLUMES FIRST
  # Volume 2
  VCSLOT=2
  VCVOLUME=/home/joey/e6ef0971-7801-442f-9f6c-f3f945922efb
  VCMOUNT=/media/veracrypt2
  VCPASSWD=$PASSWORD
  VCKEYFIL=
  echo "Mounting volume $VCVOLUME to mount point $VCMOUNT" | tee -a "$LOGFILE"
  echo $PASSWORD | veracrypt --text --mount $VCVOLUME $VCMOUNT --password $VCPASSWD --pim 0 --keyfiles "$VCKEY" --protect-hidden no --slot $VCSLOT --verbose

  # Volume 1 - requires key
  VCSLOT=1
  VCVOLUME=/home/joey/3c1547fa-1ad3-11eb-adc1-0242ac120002
  VCMOUNT=/media/veracrypt1
  VCPASSWD=$PASSWORD
  VCKEY=/home/joey/.safe/3c1547fa-1ad3-11eb-adc1-0242ac120002.key
  echo "Mounting volume $VCVOLUME to mount point $VCMOUNT" | tee -a "$LOGFILE"
  echo $PASSWORD | veracrypt --text --mount $VCVOLUME $VCMOUNT --password $VCPASSWD --pim 0 --keyfiles "$VCKEY" --protect-hidden no --slot $VCSLOT --verbose

  # List volumes
  echo "Mounted Veracrypt volumes:" | tee -a "$LOGFILE"
  echo $PASSWORD | veracrypt --text --list | tee -a "$LOGFILE"

  # Display system notification
  notify-send "Veracrypt" "Veracrypt volumes mounted." -t 0 -u Normal -i /usr/share/icons/mate/48x48/status/changes-prevent.png

  # Create lock file
  echo $(date) > $LOCKFILE

fi

# restore IFS
IFS=$OLDIFS

echo "Script completed: `date`" | tee -a "$LOGFILE"
echo --------------------------------------------------------------------------  | tee -a "$LOGFILE"


When the above script is run in terminal it prompts for the password and using “tee” outputs log entries to the screen and a file.

joey@HAVEN-E6520:~$ Scripts/veracrypt.v2.sh 
--------------------------------------------------------------------------
Executing script: veracrypt.v2.sh
Enter Password (not echoed): 
NOTE: If prompted to enter 'Administrator' password, ignore it.
Attempting to mount Veracrypt volumes
Mounting volume /home/joey/e6ef0971-7801-442f-9f6c-f3f945922efb to mount point /media/veracrypt2
Volume "/home/joey/e6ef0971-7801-442f-9f6c-f3f945922efb" has been mounted.
Mounting volume /home/joey/3c1547fa-1ad3-11eb-adc1-0242ac120002 to mount point /media/veracrypt1
Volume "/home/joey/3c1547fa-1ad3-11eb-adc1-0242ac120002" has been mounted.
Mounted Veracrypt volumes:
2: /home/joey/e6ef0971-7801-442f-9f6c-f3f945922efb /dev/mapper/veracrypt2 /media/veracrypt2
1: /home/joey/3c1547fa-1ad3-11eb-adc1-0242ac120002 /dev/mapper/veracrypt1 /media/veracrypt1
Script completed: Mon 12 Sep 2022 12:33:50 AM EDT
--------------------------------------------------------------------------
joey@HAVEN-E6520:~$ 

Running the script again causes it to dismount the volumes.

joey@HAVEN-E6520:~$ Scripts/veracrypt.v2.sh 
--------------------------------------------------------------------------
Executing script: veracrypt.v2.sh
Enter Password (not echoed): 
NOTE: If prompted to enter 'Administrator' password, ignore it.
Lock file found.
Attempting to un-mount Veracrypt volumes
Script completed: Mon 12 Sep 2022 12:34:04 AM EDT
--------------------------------------------------------------------------
joey@HAVEN-E6520:~$ 

Resources

https://linuxhint.com/how-to-install-and-use-veracrypt-on-ubuntu/

https://arcanecode.com/2021/06/14/veracrypt-on-the-command-line-for-windows/

Upgrade LibreOffice 7.3.2.2 on Linux Mint

Commands to install LibreOffice 7.3.2.2 from the Terminal in Linux Mint. Get link to most recent version from https://download.documentfoundation.org/libreoffice/stable/
# tip: cache password with "sudo ls"
# uninstall currently installed version
sudo apt-get remove libreoffice*
sudo apt-get remove --purge libreoffice*

# download and install LibreOffice
cd ~/Install
wget https://download.documentfoundation.org/libreoffice/stable/7.3.2/deb/x86_64/LibreOffice_7.3.2_Linux_x86-64_deb.tar.gz
tar -xvzf LibreOffice_7.3.2_Linux_x86-64_deb.tar.gz
cd LibreOffice_7.3.2.2_Linux_x86-64_deb/DEBS
sudo dpkg -i *.deb

# download and install offline help files 
cd ~/Install
wget https://download.documentfoundation.org/libreoffice/stable/7.3.2/deb/x86_64/LibreOffice_7.3.2_Linux_x86-64_deb_helppack_en-US.tar.gz
tar -xvzf LibreOffice_7.3.2_Linux_x86-64_deb_helppack_en-US.tar.gz
cd LibreOffice_7.3.2.2_Linux_x86-64_deb_helppack_en-US/DEBS
sudo dpkg -i *.deb

# delete extracted installation files
cd ~/Install
rm -rf ~/Install/LibreOffice_7.3.2.2_Linux_x86-64_deb
rm -rf ~/Install/LibreOffice_7.3.2.2_Linux_x86-64_deb_helppack_en-US

Upgrade LibreOffice 7.1.5.2 on Linux Mint

Commands to install LibreOffice 7.1.5.2 from the Terminal in Linux Mint. Get link to most recent version from https://download.documentfoundation.org/libreoffice/stable/

# tip: cache password with "sudo ls"
# uninstall currently installed version
sudo apt-get remove libreoffice-*
sudo apt-get remove --purge libreoffice-*

# download and install LibreOffice
cd ~/Install
wget https://download.documentfoundation.org/libreoffice/stable/7.1.5/deb/x86_64/LibreOffice_7.1.5_Linux_x86-64_deb.tar.gz
tar -xvzf LibreOffice_7.1.5_Linux_x86-64_deb.tar.gz
cd LibreOffice_7.1.5.2_Linux_x86-64_deb/DEBS
sudo dpkg -i *.deb

# download and install offline help files 
cd ~/Install
wget https://download.documentfoundation.org/libreoffice/stable/7.1.5/deb/x86_64/LibreOffice_7.1.5_Linux_x86-64_deb_helppack_en-US.tar.gz
tar -xvzf LibreOffice_7.1.5_Linux_x86-64_deb_helppack_en-US.tar.gz
cd LibreOffice_7.1.5.2_Linux_x86-64_deb_helppack_en-US/DEBS
sudo dpkg -i *.deb

# delete extracted installation files
cd ~/Install
rm -rf ~/Install/LibreOffice_7.1.5.2_Linux_x86-64_deb
rm -rf ~/Install/LibreOffice_7.1.5.2_Linux_x86-64_deb_helppack_en-US

Upgrade LibreOffice 7.1.2.2 on Linux Mint

Commands to install LibreOffice 7.1.2.2 from the Terminal in Linux Mint. Get link to most recent version from https://download.documentfoundation.org/libreoffice/stable/

# tip: cache password with "sudo ls"
# uninstall currently installed version
sudo apt-get remove libreoffice-*
sudo apt-get remove --purge libreoffice-*

# download and install LibreOffice
cd ~/Install
wget https://download.documentfoundation.org/libreoffice/stable/7.1.2/deb/x86_64/LibreOffice_7.1.2_Linux_x86-64_deb.tar.gz
tar -xvzf LibreOffice_7.1.2_Linux_x86-64_deb.tar.gz
cd LibreOffice_7.1.2.2_Linux_x86-64_deb/DEBS
sudo dpkg -i *.deb

# download and install offline help files 
cd ~/Install
wget https://download.documentfoundation.org/libreoffice/stable/7.1.2/deb/x86_64/LibreOffice_7.1.2_Linux_x86-64_deb_helppack_en-US.tar.gz
tar -xvzf LibreOffice_7.1.2_Linux_x86-64_deb_helppack_en-US.tar.gz
cd LibreOffice_7.1.2.2_Linux_x86-64_deb_helppack_en-US/DEBS
sudo dpkg -i *.deb

# delete extracted installation files
cd ~/Install
rm -rf ~/Install/LibreOffice_7.1.2.2_Linux_x86-64_deb/DEBS
rm -rf ~/Install/LibreOffice_7.1.2.2_Linux_x86-64_deb_helppack_en-US

Upgrade LibreOffice 6.4.5.2 on Linux Mint

Commands to install LibreOffice 6.4.5.2 from the Terminal in Linux Mint. Get link to most recent version from https://www.libreoffice.org/download/

# tip: cache password with "sudo ls"
# uninstall currently installed version
sudo apt-get remove libreoffice-*
sudo apt-get remove --purge libreoffice-*

# download and install LibreOffice
cd ~/Install
wget https://download.documentfoundation.org/libreoffice/stable/6.4.5/deb/x86_64/LibreOffice_6.4.5_Linux_x86-64_deb.tar.gz
tar -xvzf LibreOffice_6.4.5_Linux_x86-64_deb.tar.gz
cd LibreOffice_6.4.5.2_Linux_x86-64_deb/DEBS
sudo dpkg -i *.deb

# download and install offline help files 
cd ~/Install
wget https://download.documentfoundation.org/libreoffice/stable/6.4.5/deb/x86_64/LibreOffice_6.4.5_Linux_x86-64_deb_helppack_en-US.tar.gz
tar -xvzf LibreOffice_6.4.5_Linux_x86-64_deb_helppack_en-US.tar.gz
cd LibreOffice_6.4.5.2_Linux_x86-64_deb_helppack_en-US/DEBS
sudo dpkg -i *.deb

# delete extracted installation files
rm -rf ~/Install/LibreOffice_6.4.5.2_Linux_x86-64_deb
rm -rf ~/Install/LibreOffice_6.4.5.2_Linux_x86-64_deb_helppack_en-US

Copy filename and path from Office

You can copy to the clipboard the full filename, including the path, of the current document in Microsoft Office applications. This is helpful in increasing productivity since you do not have to open Windows Explorer then hunt down your file and copy the path from there (by holding down the SHIFT key – even MORE work!!)

In the Office application, in this case Excel, click on the File tab:

In the Info section the document name is displayed with the document’s location displayed right below it. This line is clickable. When clicked on you get the option to copy the link location to the clipboard:

Upgrade LibreOffice 6.2.5.2 on Linux Mint

Commands to install LibreOffice 6.2.5.2 from the Terminal in Linux Mint. Get link to most recent version from https://www.libreoffice.org/download/

# tip: cache password with "sudo ls"
# uninstall currently installed version
sudo apt-get remove libreoffice-*
sudo apt-get remove --purge libreoffice-*

# download and install LibreOffice
cd ~/Install
wget https://download.documentfoundation.org/libreoffice/stable/6.2.5/deb/x86_64/LibreOffice_6.2.5_Linux_x86-64_deb.tar.gz
tar -xvzf LibreOffice_6.2.5_Linux_x86-64_deb.tar.gz
cd LibreOffice_6.2.5.2_Linux_x86-64_deb/DEBS
sudo dpkg -i *.deb

# download and install offline help files 
cd ~/Install
wget http://download.documentfoundation.org/libreoffice/stable/6.2.5/deb/x86_64/LibreOffice_6.2.5_Linux_x86-64_deb_helppack_en-US.tar.gz
tar -xvzf LibreOffice_6.2.5_Linux_x86-64_deb_helppack_en-US.tar.gz
cd LibreOffice_6.2.5.2_Linux_x86-64_deb_helppack_en-US/DEBS
sudo dpkg -i *.deb

# delete extracted installation files
rm -rf ~/Install/LibreOffice_6.2.5.2_Linux_x86-64_deb
rm -rf ~/Install/LibreOffice_6.2.5.2_Linux_x86-64_deb_helppack_en-US

Get ShoreTel Agents Using Powershell

The Powershell script below can be used to quickly get the number of Shoretel Workgroup agents currently logged-in to take calls. Save the code to .ps1 file.

Add-Type -Path "C:\Program Files (x86)\MySQL\MySQL Connector Net 6.10.8\Assemblies\v4.5.2\MySql.Data.dll"
$Connection = [MySql.Data.MySqlClient.MySqlConnection]@{ConnectionString='server=172.18.1.10;port=4308;uid=st_configread;pwd=passwordconfigread;database=shoreware'}
$Connection.Open()
$MYSQLCommand = New-Object MySql.Data.MySqlClient.MySqlCommand
$MYSQLDataAdapter = New-Object MySql.Data.MySqlClient.MySqlDataAdapter
$MYSQLDataSet = New-Object System.Data.DataSet
$MYSQLCommand.Connection=$Connection
$MYSQLCommand.CommandText='SELECT COUNT(UserDN) AS ''ActiveAgents'' FROM shoreware.workgroupagents WHERE AgentStateID not in (0);'
$MYSQLDataAdapter.SelectCommand=$MYSQLCommand
$NumberOfDataSets=$MYSQLDataAdapter.Fill($MYSQLDataSet, 'data')
foreach($DataSet in $MYSQLDataSet.tables[0])
{
 $ActiveAgents = $DataSet.ActiveAgents
}
$Connection.Close()
echo "`n`nTOTAL LOGGED IN AGENTS: $ActiveAgents`n`n"

When executed the script will return the number of agents logged-in similar to this:

Note: the MySQL .NET connector for the version of MySQL server running on your ShoreTel server must be installed on the workstation running the script.

Resources:
http://www.systemadept.com/2017/07/12/querying-mysql-databases-from-powershell/?i=1
https://www.quadrotech-it.com/blog/querying-mysql-from-powershell

Add Exchange account to Outlook Mail App

Microsoft has updated the Outlook Mail App (at least for Android) and broke the connection for Exchange accounts. If you already had an Exchange account you’ll likely find it no-longer synchronizes with Exchange.

Furthermore, if you attmept to delete and re-add the account you’ll find you cannot select a type of account to add (or so it seems).

You can still use the Outlook app to check Exchange mailboxes. You just have to know the trick!

  1. Tap the Gear icon to open the Settings window:
  2. Tap Add Account:
  3. Then select Add an email account at bottom of screen:
  4. The app will automatically find accounts on the device and select them to add. Unselect the accounts you don’t want added and then tap Add Account at bottom of screen:
  5. At this point the app will prompt for an email address. It will use this to create an IMAP account (we don’t want this). Enter email address and tap Continue
  6. Here is the trick! Tap the ? icon:
  7. At the bottom of the screen will be additional options. Tap Change account provider:
  8. Now, you can tap Exchange to create an Exchange account:
  9. You’ll likely need to enter additional information like server name, domain, etc. To do this enable Advanced Settings:
  10. Enter any needed information and tap the check-mark icon
  11. The Outlook Mail App will attempt to connect…
  12. … and if successful you should be able to view your Exchange mailbox:

These screenshots came off my Kindle Fire tablet. However, the same problem was overcome on a Lenovo 10″ tablet using these instructions.

Upgrade LibreOffice on Linux Mint

Commands to install LibreOffice 6.2 from the Terminal in Linux Mint. Get link to most recent version from https://www.libreoffice.org/download/

# tip: cache password with "sudo ls"
# uninstall currently installed version
sudo apt-get remove libreoffice-core
sudo apt-get remove --purge libreoffice-core

# download and install LibreOffice
cd ~/Install
wget https://www.libreoffice.org/donate/dl/deb-x86_64/6.2.3/en-US/LibreOffice_6.2.3_Linux_x86-64_deb.tar.gz
tar -xvzf LibreOffice_6.2.3_Linux_x86-64_deb.tar.gz
cd LibreOffice_6.2.3.2_Linux_x86-64_deb/DEBS
sudo dpkg -i *.deb

# download and install offline help files 
cd ~/Install
wget http://download.documentfoundation.org/libreoffice/stable/6.2.3/deb/x86_64/LibreOffice_6.2.3_Linux_x86-64_deb_helppack_en-US.tar.gz
tar -xvzf LibreOffice_6.2.3_Linux_x86-64_deb_helppack_en-US.tar.gz
cd LibreOffice_6.2.3.2_Linux_x86-64_deb_helppack_en-US/DEBS
sudo dpkg -i *.deb

# delete extracted installation files
rm -rf ~/Install/LibreOffice_6.2.3.2_Linux_x86-64_deb
rm -rf ~/Install/LibreOffice_6.2.3.2_Linux_x86-64_deb_helppack_en-US

Command-line Compression Options

A comparison of command-line options to compress files using 7-Zip and native commands in Windows and Linux.

For testing I created a Word document of Lorem Ipsum and saved it in Word and PDF formats.

Windows Command Prompt

There is no built-in Windows program able to run in a CMD prompt that does what is wanted.* However, the open-source utility 7za.exe can be copied to any Windows folder without installation and be executed from a batch file.


Command: 7z.exe a -t7z target.7z C:\source\folder\

C:\_Tools\7zip\7za.exe a -t7z C:\Temp\Zip\test.7z C:\Temp\Zip\Files\

Changing the archive type to “zip” causes 7Zip to create a slightly larger archive.

Powershell Core on Windows and Linux

Powershell Core can be installed on both Windows and Linux. The following commands will work with Windows Powershell (deprecated) and Powershell Core (open-source).


# Command syntax:
# Compress-Archive -Path C:\source\folder -DestinationPath C:\target\target.zip
  
Compress-Archive -Path C:\Temp\Zip\files -DestinationPath C:\Temp\Zip\powershell.zip


# Command syntax:
# Compress-Archive -Path C:\source\folder -DestinationPath C:\target\target.zip
  
Compress-Archive -Path /home/joey/temp/zip/files -DestinationPath /home/joey/temp/zip/powershell2.zip

Tar command on Linux and Windows 10 BASH

Linux includes the venerable “tar” command, once used to create tape-archives. Installing the Ubuntu Linux subsystem on Windows 10 brngs this feature to Windows as well.


# Command syntax:
# tar -czvf name-of-archive.tar.gz /path/to/directory-or-file
tar -czvf files.tar.gz /mnt/c/temp/zip/files/

Same command run on Linux Mint.


# Command syntax:
# tar -czvf name-of-archive.tar.gz /path/to/directory-or-file
tar -czvf files2.tar.gz /home/joey/temp/zip/files/

Bonus: Windows Compressed Folders

Just to compare how efficient Windows built-in feature is to the command-line options above.


Resources:

https://superuser.com/questions/1105516/comparing-7z-exe-and-7za-exe

* There are compression tools built-in to Windows such as compact and makecab that are not covered here.

Generate passwords using Powershell

The Powershell script below can be used to generate 20 passwords using random words and numbers. Save the code to .ps1 file along with a “words” file in .csv format.


# Generates passphrases similar to password generator on intranet
# inspired by:
# https://www.hanselman.com/blog/DictionaryPasswordGeneratorInPowershell.aspx

# requires CSV file in same directory as script
#--------------------------------------------------------------------------------------------------

$rand = new-object System.Random

# read-in very large file creating smaller list of random words
$words = Get-Content "words.csv" | Sort-Object {Get-Random} -unique | select -first 100

Function Create-Password
{ 
  # query the smaller list of words for single entry (2 times)
  $word1 = $words | Sort-Object {Get-Random} -unique | select -first 1  
  $word2 = $words | Sort-Object {Get-Random} -unique | select -first 1  

  # create random digits
  $number1 = Get-Random -Minimum 1000 -Maximum 9999
  
  # concatenante and return new random password
  return (Get-Culture).TextInfo.ToTitleCase($word1) + (Get-Culture).TextInfo.ToTitleCase($word2) + $number1

}

# generate 20 passwords
for($i=1; $i -le 20; $i++){
  Create-Password
}

When executed the script will return 20 random passwords similar to this:

Note: you will need a “words” file from which random words will be pulled. I already had a “words” table in a MySQL database and used it to query for words between 5 and 7 characters in length. This gave me a file with about 15,000 words.

More information about obtaining a words list can be found on the following sites:
https://github.com/dwyl/english-words
https://stackoverflow.com/questions/2213607/how-to-get-english-language-word-database

Move Dropbox files on Linux Mint

I have the Dropbox client installed on my Linux Mint machine and it has worked flawlessly for years. Suddenly, I started getting a notification pop-up telling me to move my Dropbox files as they will stop being synced in November.

A quick search revealed the rather cryptic message is a result of Dropbox’s decision to stop supporting certain file systems across all operating systems. With Linux appearing to be the most impacted as they will only support Ext4 without encryption (unless whole-disk; e.g. LUKS) going forward. Of course, I running Ext4 with my Home directory encrypted.

So, after looking for alternatives I decided to stay with Dropbox and try to work-around the problem. I decided I would create a partition that Dropbox would like. Since my laptop (an old Dell 6250) has an SD card reader I rarely use I decided to use an 16GB SD card (8 times more storage than I have with Dropbox).

First, I formatted an SD card as Ext4:

Then I moved the folder location in the Dropbox client to use the new directory. The client automatically moves the file and deletes the old location folder.


Next step was to create a symlink to make the old location still work for applications/scripts that would look to the old location:


ln -s /media/joey/Sync/Dropbox /home/joey/Dropbox
  

The only real risk is the SD card getting corrupted and losing the files. To address this a simple bash script will backup the files each night:


#!/bin/bash

# Backup Dropbox folder to local disk

# Run from via cron:
# /home/joey/Scripts/backup_dropbox.sh
# ---------- copy ----------
# Backup Dropbox at 1AM each day
# * 1 * * * /home/joey/Scripts/backup_dropbox.sh 1> /dev/null
# ---------- copy ----------

RUNDATE=`date +%Y%m%d`                     # append date to file
FILENAME=Dropbox_backup-$RUNDATE.tar.gz    # name of backup file
SOURCEDIR=/media/joey/Sync/Dropbox         # Dropbox location (real location)
TARGETDIR=/home/joey/Backups               # Destination of backup file

# run archive command
tar -cpzf $TARGETDIR/$FILENAME $SOURCEDIR